This program is on all the computers in Turlington 1341, the classroom.
- Develop your vocabulary based on particular situations.
- Work on pronunciation with visual feedback.
*Note: the classroom computers have very high default sound settings. Open Sanako Media Player first to regulate the sound. Also, you can press Ctrl + Esc to access the Windows volume controls.
Login screen
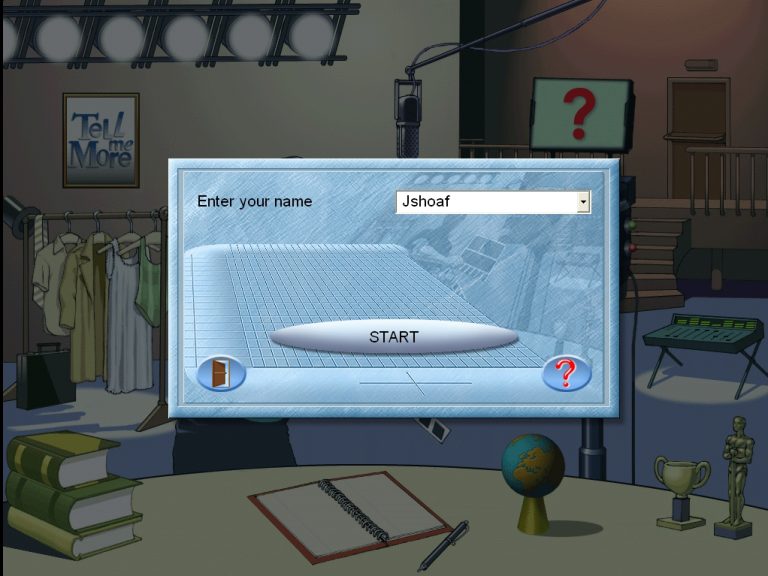
Login screen
Next
Menus
The first page you see is the “FILM SET.” This provides a menu for accessing different kinds of activities. The clothes rack is “choose your lesson,” for example.
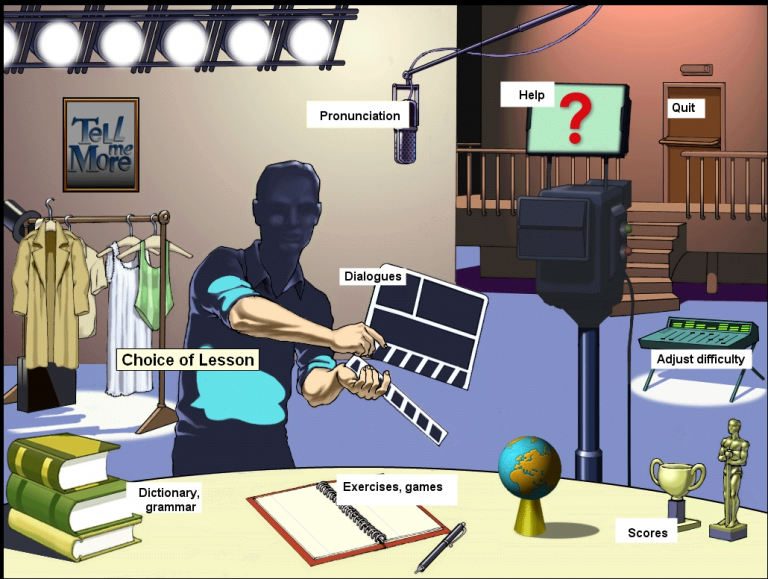
Every page has a menu running along the bottom which allows you to
go back one page, go to the “Film Set,” or choose a type of activity.
To change lessons, you have to return to the Film Set and click on the clothes rack.

Menus
Next
Choosing a lesson
You choose a lesson by clicking on it. When it is outlined in green, it has been selected. After that, if you click on any activity it will refer to the grammar, vocabulary, and situations for that lesson. There are a lot of lessons, all the way into the realm of business Japanese.
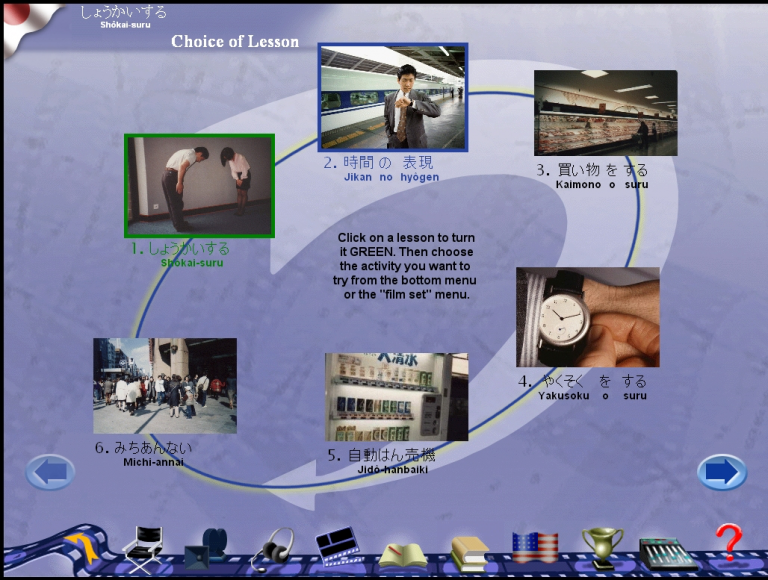
Choosing a lesson
Next
Adjusting difficulty; interfaces for listening and speaking
There are two main kinds of speaking and listening exercises, the DIALOGUE and PRONUNCIATION. These use a kind of “speech recognition” that “knows” a few possible things you might say and tells you whether you said them correctly.In all cases, you are trying to match a model voice.
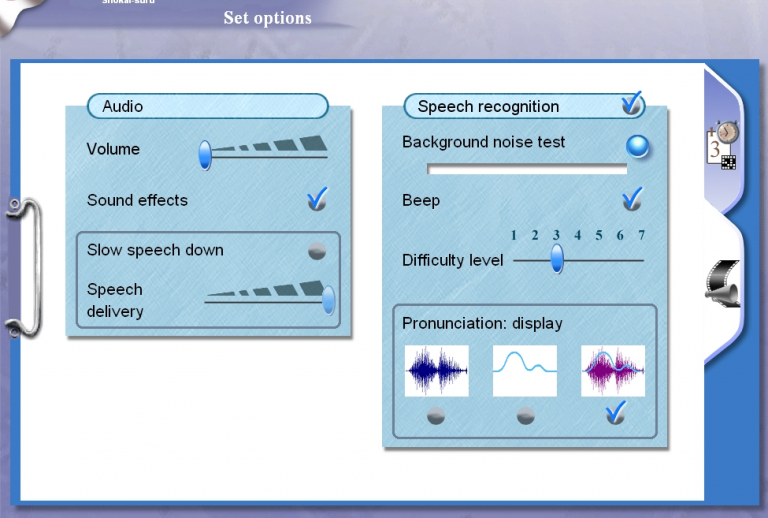
You can change the difficulty level of the recognition by going to OPTIONS and raising the level from 3 (normal) to 7 (hard). At 7, you have to try harder to match the model voices. Be sure that the “Speech recognition” option is checked; if it is not checked, the dialogues will not work or be scored properly.
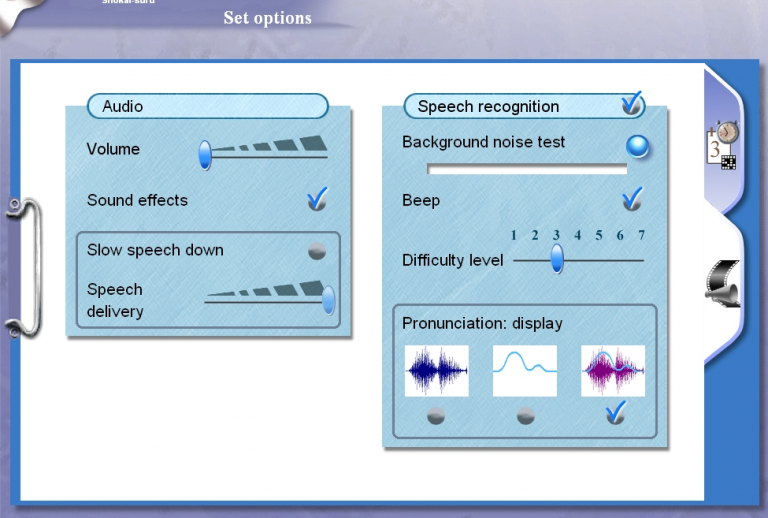
NOTE: You can also use OPTIONS to specify what kind of text you want to see (no romanji at all, for example).
In these exercises, you will see an interface telling you to “Listen” and then to “Speak.” For the Dialogues, you listen to a question or comment to which you must respond. For Pronunciation, you listen to the model voice.


If the whole thing is going too fast for you, you can use OPTIONS to slow it down. You can also just use the Pause button to get your bearings.

Adjusting difficulty; interfaces for listening and speaking
Next
Dialogues
In the DIALOGUE exercise, you hear a question or comment and respond by saying aloud a sentence which is presented as one of several choices on the page.
Don’t forget the pause button!
You can mouse over an unfamiliar word to get a translation.
You can click on the loudspeaker next to a sentence to hear it spoken.
When you give a meaningful reply, sometimes you get a further comment!
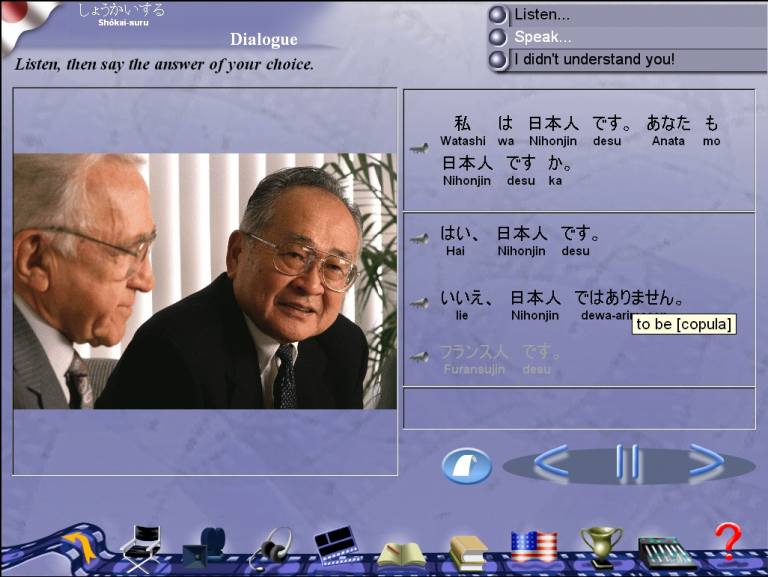
If there is no invitation to speak in the top right-hand corner, check Troubleshooting: Turning on Speech Recognition
Dialogues
Next
Pronunciation 1: Choosing words or sentences
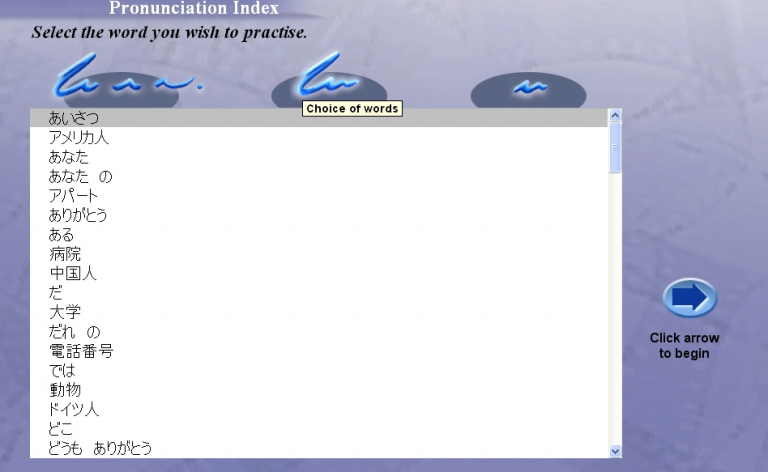
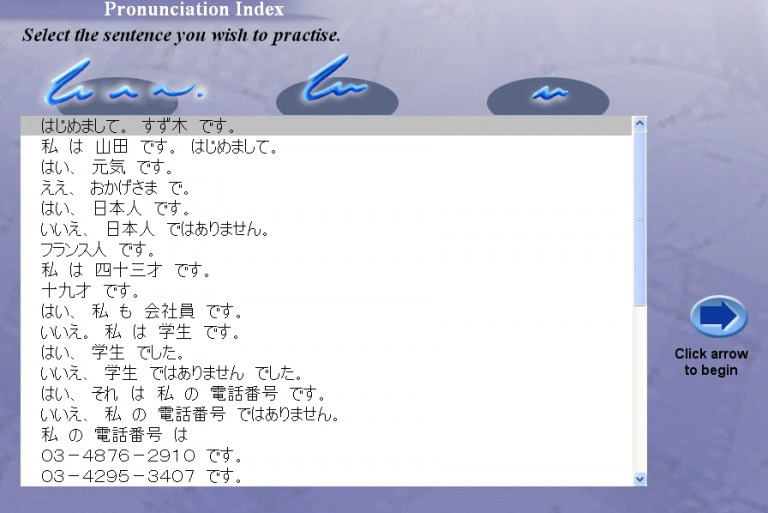
You can choose whether to work on single words (“dictionary pronunciation”) or on sentences.
Pronunciation 1: Choosing words or sentences
Next
Pronunciation 2: Scores
The idea here is to imitate the native speaker as closely as possible. This means developing speed as well as correctness.
Scores are recorded as blocks of purple (not good enough) and blue (acceptable). If you raise the difficulty level in OPTIONS, it will be harder to get to the blue. Words which are not acceptable appear in red.

Below are attempts at a sentence. The upper image had a setting at Difficulty Level 3. The bottom one had Difficulty Level 7.
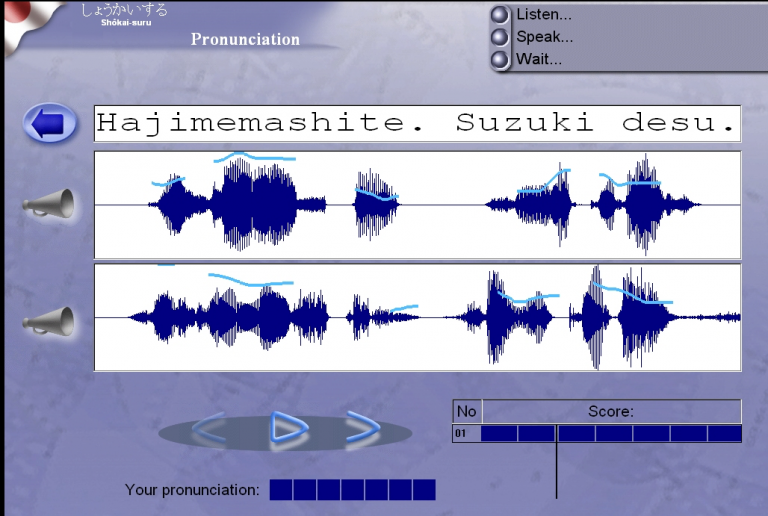
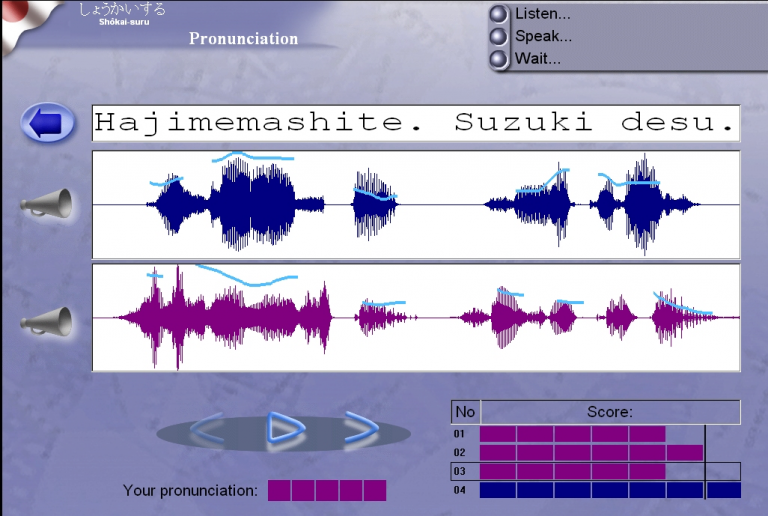
Pronunciation 2: Scores
Next
Pronunciation 3: Advice
Notice that the graphs give you a lot more information on your pronunciation than just the scores you achieve. You can compare your intonation to the native speaker (the thin line), speed, and volume (the spiky waveform). Of course there is not a single correct way to pronounce any language, and not all native speakers will have the same patterns. But you can use the visual information to understand the syllable length (mora) and rising or falling tones which are appropriate for a particular word or phrase.

Don’t keep trying to practice until you can match the model exactly, but learn what to listen for.
Pronunciation 3: Advice
Next
Exercises 1: Orange Pennant of Death
When you click on the exercises, you get a menu of different kinds of games to play. Do not click on the orange pennant. Instead of opening an exercise, it will kill the program and maybe the computer.
If one type of exercise is not available for this lesson, it will appear greyed-out.
You click the red checkmark to check how you are doing. You can click the lightbulb to get the answer.

Some of the exercises are more fun than others.
The Dictation and Crossword require typing in Romanji. They include a set of “long” vowel buttons–when you click on the button the desired vowel is inserted.
Let’s look at a few other exercises…
Next
Exercises 2: Vocabulary (Picture matching)
If you like multiple choice, this is a way to build vocabulary. Choose the right word for the picture and you get applause.
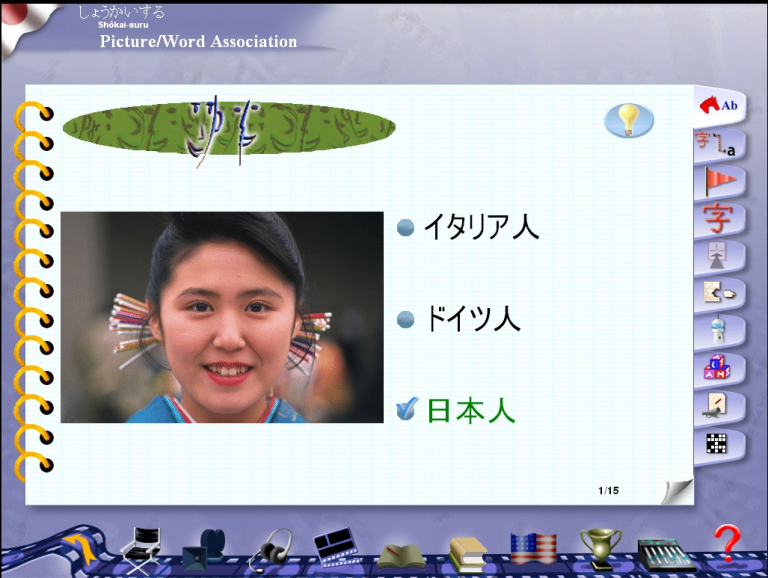
This is what it looks like when you choose the wrong answer.

Exercises 2: Vocabulary
Next
Exercises 3: Kanji
This is the fourth tab. It gives you a chance to learn new Kanji by matching up words to their hiragana equivalents.
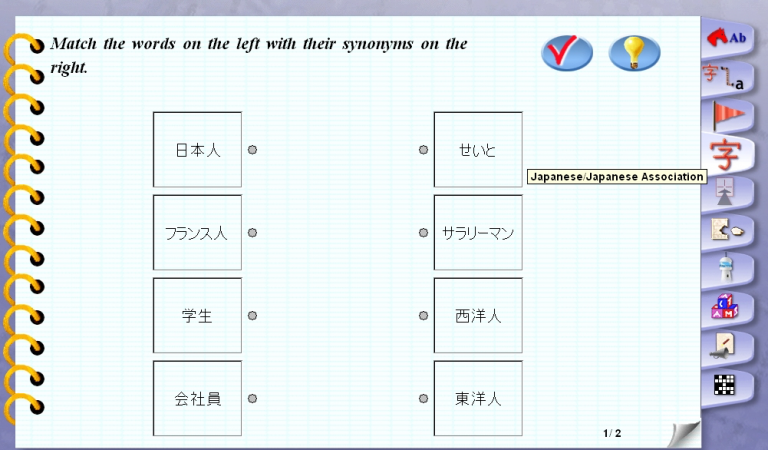
Exercises 3: Kanji
Next
Missing Words
This is the sixth tab from the top, “Missing Words.” You drag the correct word to the blank in the sentence. If you don’t know the vocabulary, you can mouse over a word to get an English translation. Correct choices appear in green, incorrect ones in red.
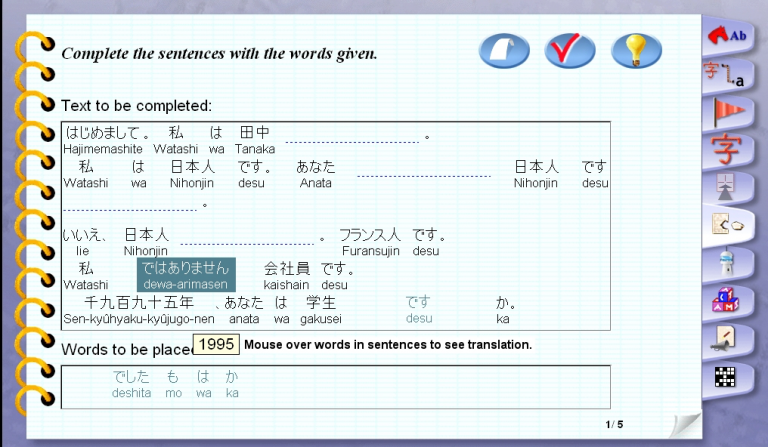
Exercises 4 Missing Words
Next
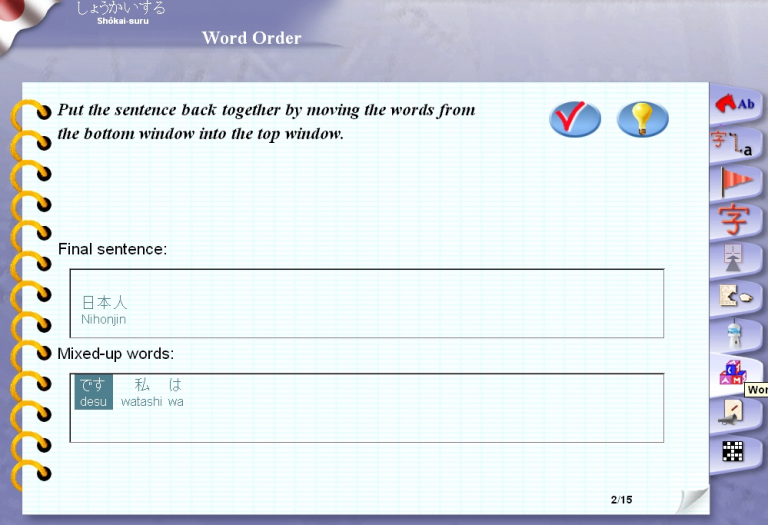
Exercises 5: Word Order
Next
After it has played all the sentences, you can play the first one and begin transcribing. You can play it as many times as you need to. In transcribing:
The first letter must be capitalized.
There must be final punctuation.
Long vowels must be indicated; you can insert them by clicking on the buttons at the bottom of the page.
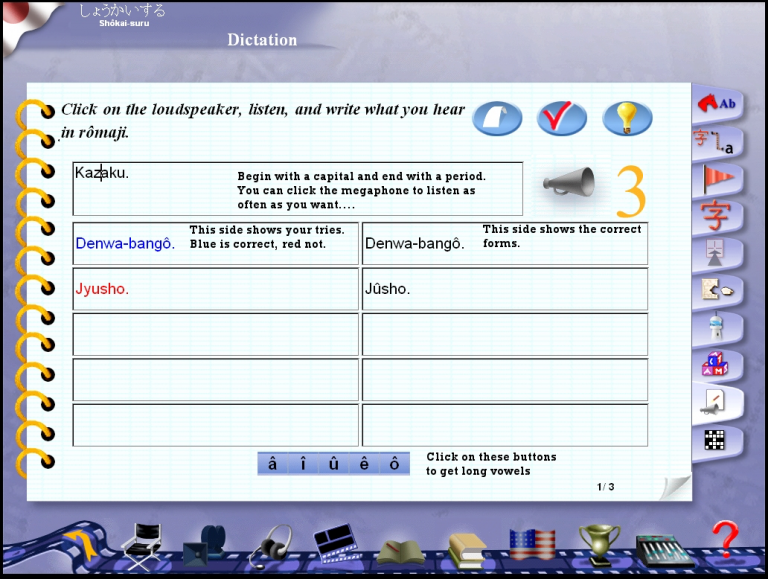
When you have a correct transcription, it goes down into the first space on the left, colored blue. You can click on the checkmark button to check. It will circle the first problem area. You can click on the lightbulb but then you get no credit for your try. It appears in red in the appropriate space, and the correct transcription appears on the right.


Exercises 6 Dictation
Next
Reference Works
The Menu also gives you access to reference books, a very simple grammar and a complete glossary.
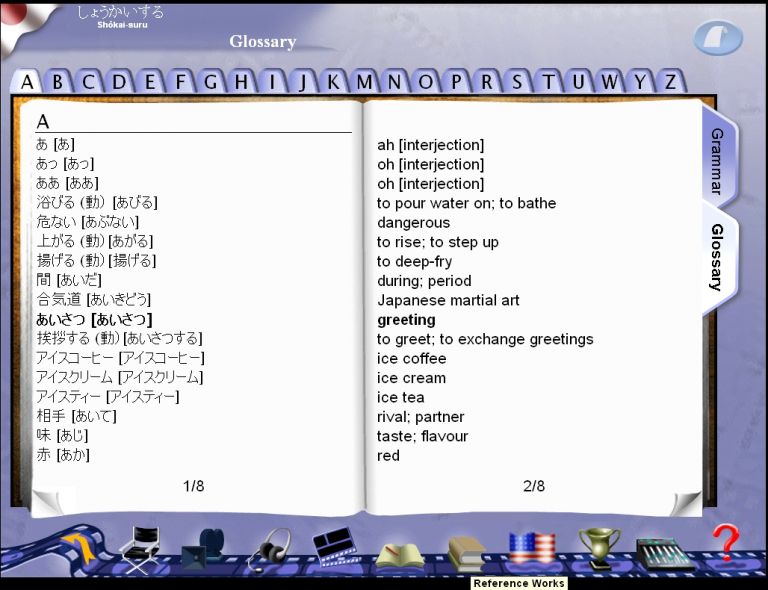
Reference Works
Next
Scores
If you do a whole lesson on the same computer, you will end up with a score. It will tell you how many exercises there were of a particular type, how many times you tried it, and how many you got right. Notice that most of the exercises offered are in the Dialogue and Pronunciation categories.
Recording the practice should be done at the end of the session when you finish the work. This can be done in one of two ways:
(1) Ask a lab assistant to note down your scores.
(2) Press Print Screen. Press Ctrl + Esc. Using the Start menu, select Programs->Accessories->Paint. In the Paint interface, press Ctrl + V to paste the entire screen into the Paint program. Then save the image file into the appropriate folder on Crossroads. Or: save it on your desktop to email to your instructor. Name the file with your name or gatorlink userid and the lesson number (for example, jshoaf1.jpg). If you plan to email it, save it as a .jpg file in Paint; Paint’s default format, bitmap, produces extremely large files, not good for emailing.
The results will certainly show up when you use new vocabulary and find yourself more comfortable speaking Japanese in class.
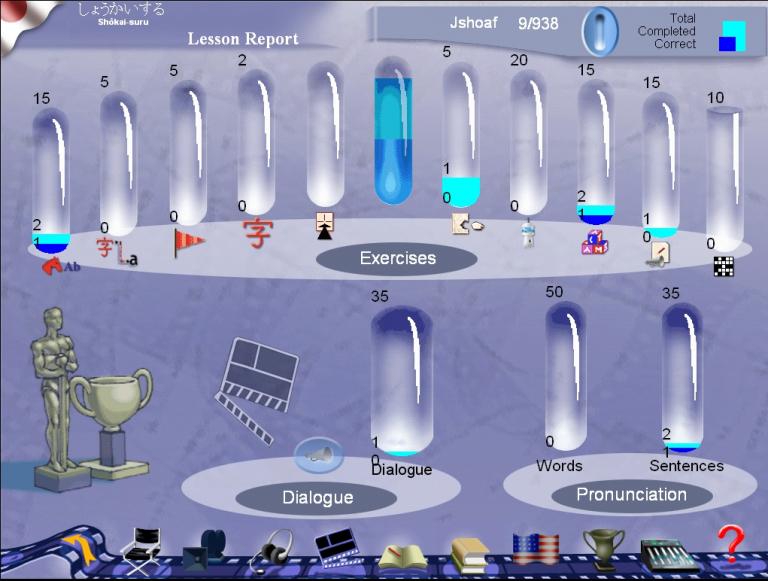
If your DIALOGUE scores are not showing up, check Troubleshooting: Turning on Speech Recognition.
Scores
Next
Troubleshooting: accessing other computer controls & programs
If you need to access the volume controls or other programs while using Tell Me More, press CTRL + ESC (or just press the key with the Windows logo).

INTERNAL ERROR #4 is an error message which prevents you from completing the exercises for a chapter. You can access the exercises in a different way. Click on the icon that takes you to to the dialogue interface:

Then click on the icon that looks like a strip of paper in a blue oval. The resulting menu will allow you to access the exercises while bypassing the error message.

Troubleshooting: accessing other computer controls & programs
Next

Then click on the icon that looks like a strip of paper in a blue oval. The resulting menu will allow you to access the exercises while bypassing the error message.

Troubleshooting: Internal Error #4
Next
Troubleshooting: Turning on speech recognition
If you are working on the DIALOGUES but there is no SPEAK feature, you are in “exploration” mode. You can click on an answer to the question, but you will not get credit
To activate the SPEAK feature, go to OPTIONS and check the “Speech recognition” feature at the top right.
